在網路上發現這篇文章,覺得寫得很不錯,所以這次就跟著這篇一起做一遍~
How to separate frontend + backend with Rails API, Nuxt.js and Devise-JWT
來學習,Rails API / Nuxt.js / JWT / Docker
Part 1: Creating a development environment 1
2
3
4
5
6
7
8
9
10
11
12
13
14
# backend
mkdir autheg
cd autheg
rails new autheg - backend - T -- skip - spring - C - B - d postgresql -- api
# -T = skip test
# -C = skip action cable
# -B = skip bundle 主要是作者要跑在 docker 裡面
# --api = 沒有任何 view 純 API server
#frontend
vue init nuxt - community / starter - template autheg - frontend
cd autheg - frontend
yarn generate - lock - entry > yarn . lock
# 跟 -B 類似,為了不 install
backend
1
2
3
4
5
6
7
8
9
10
11
12
13
14
15
16
17
18
19
20
21
22
# autheg/autheg-backend/Dockerfile
FROM ruby : 2 . 5
ARG UID
RUN adduser rails -- uid $UID -- disabled - password -- gecos ""
# 可以透過 $UID 給予不同的 user ID,並且進到任何的 container 都可以用相同的 user ID
# --disabled-password - 讓 rails 無法用密碼登入
# --gecos 用戶的詳細訊息(如姓名,年齡,電話等),因為 adduser 會提示你輸入用戶的密碼和相關的finger訊息,但是這個可以用選項--gecos來覆蓋。
ENV APP /usr/s rc / app
RUN mkdir $APP
WORKDIR $APP
COPY Gemfile * $APP /
RUN bundle install - j3 -- path vendor / bundle
# Gems and yarn packages are installed into the mounted volumes.
# This will stop you from needing to rebuild the whole Docker image every time you change the Gemfile or package.json.
COPY . $APP /
CMD [ "bin/rails" , "server" , "-p" , "8080" , "-b" , "0.0.0.0" ]
# 這裡原本是 rails,但實際在 run 的時候會有 error,因此改為 bin/rails
.dockerignore 避免 Docker 在 build 的時候,一併複製過去
1
2
3
4
# autheg/autheg-backend/.dockerignore
/vendor/ bundle
/log
/ tmp
1
2
# autheg/autheg-backend/.gitignore
/vendor/ bundle /
frontend
1
2
3
4
5
6
7
8
9
10
11
12
13
14
15
16
17
18
19
# autheg/autheg-frontend/Dockerfile
FROM node : 9
ARG UID
RUN adduser frontend -- uid $UID -- disabled - password -- gecos ""
ENV APP /usr/s rc / app
RUN mkdir $APP
WORKDIR $APP
COPY package . json yarn . lock $APP /
RUN yarn
# Gems and yarn packages are installed into the mounted volumes.
# This will stop you from needing to rebuild the whole Docker image every time you change the Gemfile or package.json.
COPY . $APP /
CMD [ "yarn" , "run" , "dev" ]
.dockerignore 避免 Docker 在 build 的時候,一併複製過去
1
2
# autheg/autheg-frontend/.dockerignore
/node_modules/
all
1
2
3
4
5
6
7
8
9
10
11
12
13
14
15
16
17
18
19
20
21
22
23
24
25
26
27
28
29
30
31
# autheg/docker-compose.yml
version : '3' # dockerfile 版本
services :
db : # 對應 rails database.yml 的 host
image : postgres
ports :
- "5432"
backend : # 會變成 REPOSITORY name autheg_backend
build :
context : autheg - backend # 要 build 的資料夾位置
args :
UID : $ { UID : - 1001 }
volumes :
- . /autheg - backend : /usr/s rc / app
# 放哪裡沒有一定 /var/www/html, /usr/src/app, /home 都有人放
ports :
- "8080:8080"
depends_on :
- db
user : rails # 對應到 adduser 的名稱
frontend : # 會變成 REPOSITORY name autheg_frontend
build :
context : autheg - frontend
args :
UID : $ { UID : - 1001 }
volumes :
- . /autheg - frontend : /usr/s rc / app
ports :
- "3000:3000"
user : frontend # 對應到 adduser 的名稱
接下來執行
1
2
3
4
# docker images
REPOSITORY TAG IMAGE ID CREATED SIZE
autheg_frontend latest 18 b1178326a7 About a minute ago 890 MB
autheg_backend latest 528 bfe5bf6d6 2 minutes ago 1 . 03 GB
1
docker - compose run - u root backend bundle
1
2
3
4
5
6
7
8
# docker ps -a
CONTAINER ID IMAGE COMMAND CREATED STATUS PORTS NAMES
a11609898c96 autheg_backend "bundle" About a minute ago Exited ( 0 ) About a minute ago autheg_backend_run_1
f088297e9b9b postgres "docker-entrypoint.s…" About a minute ago Up About a minute 0 . 0 . 0 . 0 : 32783 -> 5432 / tcp autheg_db_1
docker volume ls
# DRIVER VOLUME NAME
# local 64117d4ab46a1d0575cc7136e745cc70bf568cfb3e200c80c69ae035cde89085
1
docker - compose run frontend yarn
1
2
3
4
5
# docker ps -a
CONTAINER ID IMAGE COMMAND CREATED STATUS PORTS NAMES
d51e53bd1370 autheg_frontend "yarn" Less than a second ago Exited ( 0 ) 3 seconds ago autheg_frontend_run_1
a11609898c96 autheg_backend "bundle" 3 minutes ago Exited ( 0 ) 3 minutes ago autheg_backend_run_1
f088297e9b9b postgres "docker-entrypoint.s…" 3 minutes ago Up 3 minutes 0 . 0 . 0 . 0 : 32783 -> 5432 / tcp autheg_db_1
要再跑 bundle & yarn 是因為有做 volumes,因此利用 docker 所建立的環境,跑 host 的 bundle & yarn,讓兩邊一致
The reason you need to run bundle and yarn after building is because your docker-compose file mounts your host volumes into the containers so you need to install the packages into the host volumes as well as the images that are used to create the containers
編輯 database.yml & package.json
1
2
3
4
5
default: &default
adapter: postgresql
encoding: unicode
+ host: db
+ username: postgres
1
2
3
4
5
6
7
"private": true,
"scripts": {
- "dev": "nuxt",
+ "dev": "HOST=0.0.0.0 nuxt",
"build": "nuxt build",
"start": "nuxt start",
"generate": "nuxt generate",
HOST=0.0.0.0 nuxt so it’s visible on your host machine
再啟動一個 container 用來建立新資料庫
1
docker-compose run backend bin/rails db:create
此時 db 會 create 在,一開始設定的 db container autheg_db_1 裡面,可以
1
2
3
4
docker exec - it autheg_db_1 bash
su - postgres
psql - ls
# 就會看到 create 好的 database
看一下目前產生的 container
1
2
3
4
5
6
# docker ps -a
CONTAINER ID IMAGE COMMAND CREATED STATUS PORTS NAMES
85 d3ec81e943 autheg_backend "bin/rails db:create" 6 minutes ago Exited ( 0 ) 6 minutes ago autheg_backend_run_2
6 e1f7b406a70 autheg_frontend "yarn" 7 minutes ago Exited ( 0 ) 7 minutes ago autheg_frontend_run_1
55 ff63bb46e9 autheg_backend "bundle" 25 minutes ago Exited ( 0 ) 8 minutes ago autheg_backend_run_1
e889c2e713d0 postgres "docker-entrypoint.s…" 25 minutes ago Up 25 minutes 0 . 0 . 0 . 0 : 32770 -> 5432 / tcp autheg_db_1
將所有 container 啟動
1
2
3
docker - compose up
# docker-compose stop
# docker-compose down
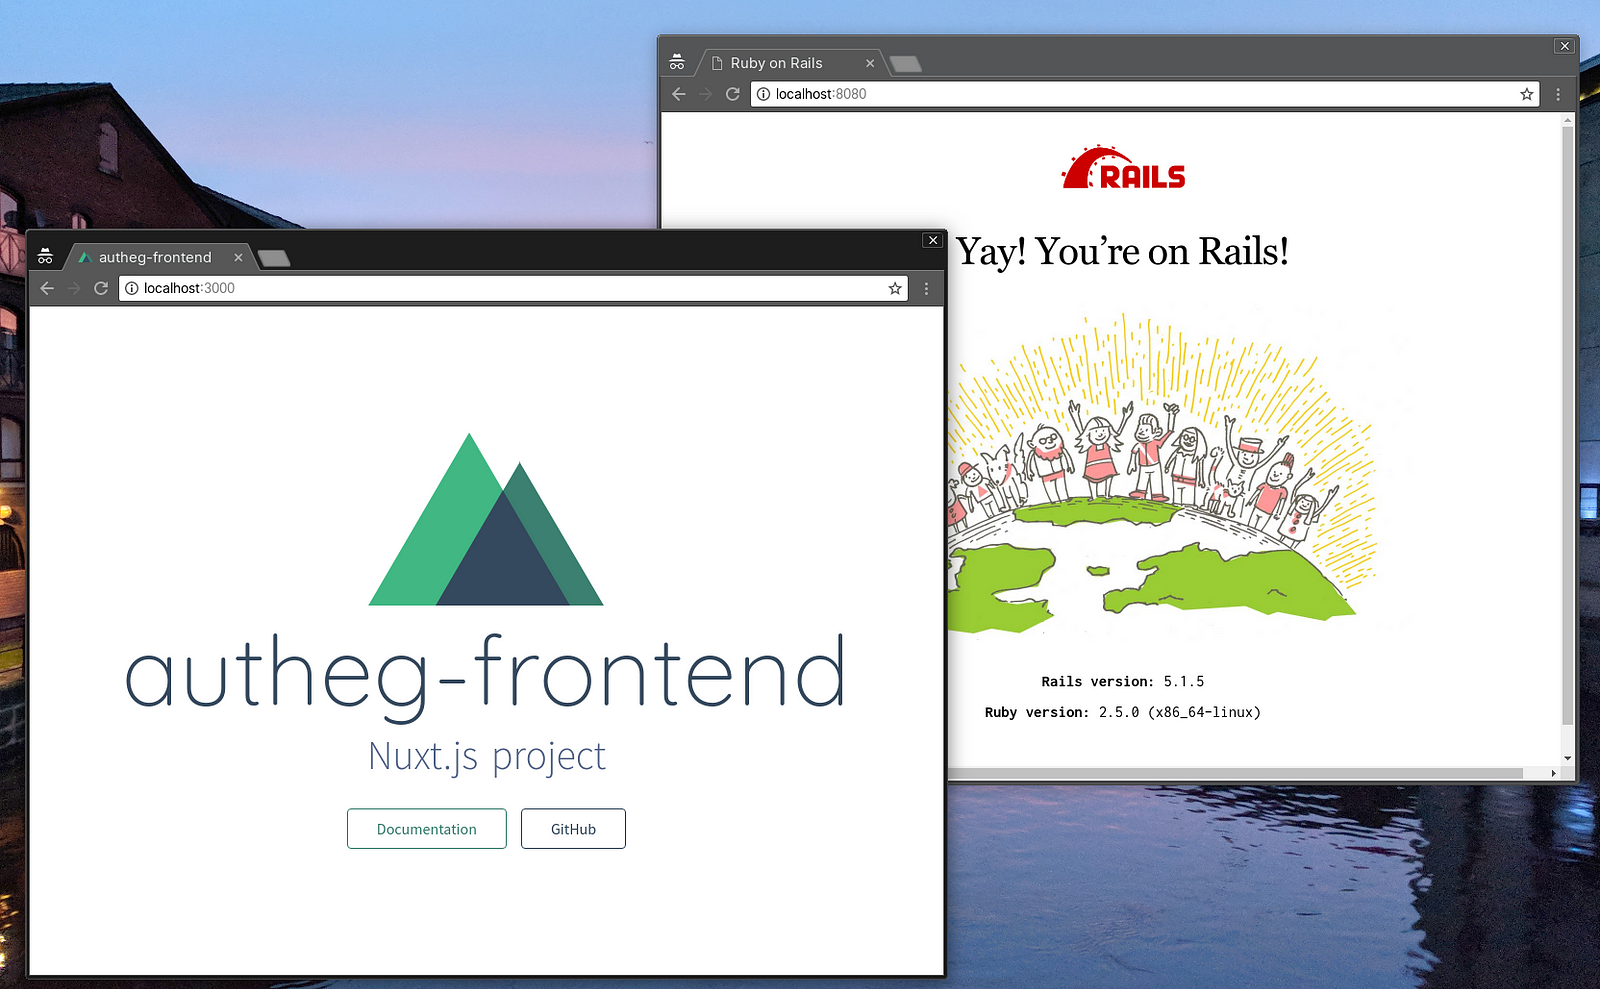
就能看到
rails : http://localhost:8080/
nuxt : http://localhost:3000/
from How to separate frontend + backend with Rails API, Nuxt.js and Devise-JWT
Part 2: Getting them talking to each other 新增 table, model, controller
1
2
3
4
5
docker - compose run backend bash
> bin / rails g resource example name :string colour : string
> bin / rails db : migrate
> bin / rails c
> > { "foo" => "green" , "bar" => "red" , "baz" => "purple" } . each { | n , c | Example . create! ( name : n , colour : c )}
編輯 controller
1
2
3
4
5
6
7
# autheg-backend/app/controllers/examples_controller.rb
class ExamplesController < ApplicationController
def index
examples = Example . all . select ( :id , :name , :colour )
render json : examples
end
end
1
2
3
4
5
6
# autheg-backend/config/routes.rb
Rails . application . routes . draw do
scope :api , defaults : { format : :json } do
resources :examples
end
end
這個步驟目前先不做,要等後面安裝 devise 才需要
1
2
3
4
5
# autheg-backend/app/controllers/application_controller.rb
class ApplicationController < ActionController :: API
include ActionController :: MimeResponds
respond_to :json
end
現在打 http://localhost:8080/api/examples 就會看到
from How to separate frontend + backend with Rails API, Nuxt.js and Devise-JWT
接著安裝 axios & vuetify
1
docker - compose run frontend yarn add @nuxtjs / axios @nuxtjs / vuetify
這邊是 hardcode 在上面,正式機不應該這樣寫
1
2
3
4
5
6
7
8
9
10
// autheg-frontend/nuxt.config.js
modules : [
'@nuxtjs/vuetify' ,
'@nuxtjs/axios'
],
axios : {
host : 'localhost' ,
port : 8080 ,
prefix : '/api'
}
更改畫面
The nuxt option to the link tells it to use Nuxt’s router to handle the link, rather than doing it in the browser.
1
2
3
4
5
6
7
8
9
10
11
12
13
14
15
16
17
// autheg-frontend/layouts/default.vue
< template >
< div id = "app" >
< v - app >
< v - toolbar app dark >
< v - toolbar - title > Auth example < /v-toolbar-title>
< v - spacer />
< v - btn icon nuxt href = "/" >< v - icon > home < /v-icon></v-btn>
< /v-toolbar>
< v - content >
< v - container fluid >
< nuxt />
< /v-container>
< /v-content>
< /v-app>
< /div>
< /template>
mounted() 會在 template 初始化的時候呼叫,並且會 call updateExamples() method,去 call /examples API 拿資料回來
1
2
3
4
5
6
7
8
9
10
11
12
13
14
15
16
17
18
19
20
21
22
23
24
25
26
27
28
29
30
// autheg-frontend/pages/index.vue
< template >
< v - layout >
< v - flex >
< v - list >
< v - list - tile v - for = "example in examples" : key = "example.id" : class = "example.colour" >
< v - list - tile - content > < /v-list-tile-content>
< /v-list-tile>
< /v-list>
< /v-flex>
< /v-layout>
< /template>
< script >
export default {
data () {
return {
examples : []
}
},
methods : {
async updateExamples () {
this . examples = await this . $axios . $get ( '/examples' )
}
},
mounted () {
this . updateExamples ()
}
}
< /script>
接著會看到 browser console 會 error,主要是因為 CROS 的原因
JavaScript isn’t allowed to query endpoints on other domains unless those domains set the CORS headers appropriately
from How to separate frontend + backend with Rails API, Nuxt.js and Devise-JWT
接著要去 backend 新增 cros 的設定,讓 frontend 可以 call
先將 Gemfile 的 comment 打開
1
2
3
4
5
6
7
8
9
10
11
12
13
14
# autheg-backend/Gemfile
gem 'rack-cors'
# autheg-backend/config/initializers/cors.rb
Rails . application . config . middleware . insert_before 0 , Rack :: Cors do
allow do
origins 'localhost:3000' # 也可以 * 就是所有 domain 都可以打進來
resource '*' ,
headers : :any ,
methods : [ :get , :post , :put , :patch , :delete , :options , :head ]
end
end
接著跑
1
docker - compose run - u root backend bundle
然後重新起動 container
1
2
ctrl + c
docker - compose up
from How to separate frontend + backend with Rails API, Nuxt.js and Devise-JWT
Part 3: Authentication with Devise-JWT 這次要加上 devise 加上 JWT
先在 Gemfile 新增
1
2
3
# autheg-backend/Gemfile
gem 'devise'
gem 'devise-jwt'
bundle
1
docker - compose run - u root backend bundle
接著先安裝 devise 參考 getting-started
1
2
3
4
5
# 開新的 container 安裝 devise
docker - compose run backend bash
bin / rails g devise : install
bin / rails g devise user
bin / rails db : migrate
到這個步驟都還沒用到 JWT ,接下來要要決定如何使令牌無效,原文選擇用 黑名單 的方式
1
bin / rails g model jwt_blacklist jti : string : index exp : datetime
並將欄位加上 null: false 和移除 t.timestamps
1
2
3
4
5
6
7
def change
create_table :jwt_blacklists do | t |
t . string :jti , null : false
t . datetime :exp , null : false
end
add_index :jwt_blacklists , :jti
end
在 model 加上 include Devise::JWT::RevocationStrategies::Blacklist
1
2
3
4
# autheg-backend/app/models/jwt_blacklist.rb
class JwtBlacklist < ApplicationRecord
include Devise :: JWT :: RevocationStrategies :: Blacklist
end
secret setting
在這裡遇到個問題 No implicit conversion of nil into String ,主要是用的 rails 版本,與原文章的 ralis(5.1) 不同,導致遇到在 5.2 版本時已經沒有 secrets.yml… 轉而改用 credentials.yml.enc,所以在這裡記錄一下兩個版本的設定
Before rails 5.2
接著產生一組 secret,做設定
1
2
bin / rails secret
# 9dd044df628a496e83c668f..
1
2
3
4
5
6
7
8
9
10
11
12
# autheg-backend/config/secrets.yml
development :
secret_key_base : xxx
jwt_secret : 9 dd044df628a496e83c668f . .
test :
secret_key_base : xxx
jwt_secret : 9 dd044df628a496e83c668f . .
production :
secret_key_base : < %= ENV["SECRET_KEY_BASE"] %>
jwt_secret: <%= ENV [ "JWT_SECRET" ] %>
1
2
3
4
# autheg-backend/config/initializers/devise.rb
config . jwt do | jwt |
jwt . secret = Rails . application . secrets . jwt_secret
end
After rails 5.2
1
2
bin / rails secret
# 9dd044df628a496e83c668f..
這時必須在 console執行 EDITOR="vim" rails credentials:edit,但是在 container 並沒有 vim 和 sudo 這個指令,因此要先切換成 root 去安裝 vim 才有辦法執行
如果無法順利執行的話可以刪掉 config/credentials.yml.enc 在執行 EDITOR="vim" rails credentials:edit 一次
1
2
3
4
5
6
7
8
docker - compose run - u root backend bash
apt - get update
apt - get install vim - y # 安裝 vim
EDITOR = "vim" bin / rails credentials : edit
# 接著編輯
secret_key_base : xxx
jwt_secret : 9 dd044df628a496e83c668f . .
1
2
3
4
# autheg-backend/config/initializers/devise.rb
config . jwt do | jwt |
jwt . secret = Rails . application . credentials [ :jwt_secret ]
end
上面 secret 設定好就可以繼續
設定 response format
1
2
3
4
5
# autheg-backend/app/controllers/application_controller.rb
class ApplicationController < ActionController :: API
include ActionController :: MimeResponds
respond_to :json
end
1
2
3
4
5
6
7
8
# autheg-backend/app/models/user.rb
class User < ApplicationRecord
# Include default devise modules. Others available are:
# :confirmable, :lockable, :timeoutable and :omniauthable
devise :database_authenticatable , :registerable ,
:recoverable , :rememberable , :trackable , :validatable ,
:jwt_authenticatable , jwt_revocation_strategy : JwtBlacklist
end
設定好跑
將 router 的 devise_scope :user 移到 api scope 裡面
1
2
3
4
5
6
7
Rails . application . routes . draw do
# For details on the DSL available within this file, see http://guides.rubyonrails.org/routing.html
scope :api , defaults : { format : :json } do
resources :examples
devise_for :users
end
end
restart containers
1
2
ctrl + c
docker - compose up
console 新增一個 User
1
2
bin / rails c
User . create! ( email : 'test@example.com' , password : 'password' )
接下來就可以來測試 user login 原文推薦使用 YARC 不過個人偏好 Postman ,都可以
1
2
3
4
5
6
7
8
POST /api/use rs / sign_in
{
"user" :{
"email" :"test@example.com" ,
"password" :"password"
}
}
from How to separate frontend + backend with Rails API, Nuxt.js and Devise-JWT
這裡可以看到 Response Headers 多了一個欄位
1
2
3
4
5
6
7
8
9
10
11
12
13
14
15
16
17
18
19
20
21
22
23
24
25
26
27
28
# 原本
{
"x-runtime" : "0.496080" ,
"etag" : "W/ \" 9a9c93785c7d5e5890c3189efa33ca10 \" " ,
"vary" : "Origin" ,
"content-type" : "application/json; charset=utf-8" ,
"location" : "/" ,
"cache-control" : "max-age=0, private, must-revalidate" ,
"transfer-encoding" : "chunked" ,
"x-request-id" : "c6a59d67-2551-496f-8f99-f69c5b79bd75" ,
"status" : 201
}
# 加上 jwt
{
"x-runtime" : "0.998534" ,
"etag" : "W/ \" d2403cf91d814bea7a094efecd1e0ae9 \" " ,
"authorization" : "Bearer eyJhbGciOiJIUzI1NiJ9.eyJzdWIiOiIxIiwic2NwIjoidXNlciIsImF1ZCI6bnVsbCwiaWF0IjoxNTMxNjY2NjA0LCJleHAiOjE1MzE2NzAyMDQsImp0aSI6ImYzMjkxMWViLTY0ZDEtNDU0NS1iNGJjLTQ5MjE2NjQwMDc1OCJ9.nP5vGhbiPfC5acnQOusY_bEZCAWF2TZ29vq28SMUX2U" ,
"vary" : "Origin" ,
"content-type" : "application/json; charset=utf-8" ,
"location" : "/" ,
"cache-control" : "max-age=0, private, must-revalidate" ,
"transfer-encoding" : "chunked" ,
"x-request-id" : "4eec0e2f-5cb5-4c4d-9ed9-be9385c79a5d" ,
"status" : 201
}
接著要來覆蓋掉 devise 原本的 session controller,讓我們可以將 jwt 加進去
先 generate devise 內建的 sessino controller
1
bin / rails generate devise : controllers users - c = sessions
並且新增一個 router,已便可以拿到 user 的 detail 資訊
這裡跟原文章不太一樣,這邊是藉由 devise 內建的 generate 產生 session controller file,是放在 app/controller/users/sessions_controller.rb,原文章應該是自行建立的檔案放在 app/controller/sessions_controller.rb,因此底下的 router 設定也會有稍微不同
1
2
3
4
5
6
7
8
9
10
# autheg-backend/config/routes.rb
Rails . application . routes . draw do
scope :api , defaults : { format : :json } do
resources :examples
devise_for :users , controllers : { sessions : 'users/sessions' }
devise_scope :user do
get 'users/current' , to : 'users/sessions#show'
end
end
end
將 Gemfile 裡的 jbuilder gem 打開
1
2
# Gemfile
gem 'jbuilder' , '~> 2.5'
1
2
3
docker - compose run - u root backend bundle
# restart containers
docker - compose up
1
2
3
4
5
6
7
8
9
10
11
12
13
14
15
# autheg-backend/app/controllers/users/sessions_controller.rb
class Users :: SessionsController < Devise :: SessionsController
def create
super { @token = current_token }
end
def show
end
private
def current_token
request . env [ 'warden-jwt_auth.token' ]
end
end
1
2
# autheg-backend/app/views/users/create.json.jbuilder
json . token @token
1
2
3
4
5
6
# autheg-backend/app/views/users/show.json.jbuilder
if user_signed_in?
json . user do
json . ( current_user , :id , :email )
end
end
接下來可以測試 login 了
1
2
3
4
5
6
7
8
9
10
11
12
13
14
15
16
17
# 登入拿 token
POST /api/use rs / sign_in
{
"user" :{
"email" :"test@example.com" ,
"password" :"password"
}
}
# 在 Header 加上剛剛登入拿到的 token
# "authorization": "Bearer eyJhbGciOiJIUzI1NiJ9.eyJzdW ..."
GET /api/use rs / current
# 登出,記得也要帶 token 才知道誰要登出
# "authorization": "Bearer eyJhbGciOiJIUzI1NiJ9.eyJzdW ..."
DELETE /api/use rs / sign_out
測試 ok 後,接下來在 ExamplesController 加上 authentication
1
2
3
4
5
6
7
8
9
# autheg-backend/app/controllers/examples_controller.rb
class ExamplesController < ApplicationController
before_action :authenticate_user!
def index
examples = Example . all . select ( :id , :name , :colour )
render json : examples
end
end
這時 GET /api/examples 就必須帶 token 否則會 error
1
2
3
4
5
GET /api/ex amples
{
"error" : "You need to sign in or sign up before continuing."
}
接下來回到 frontend,會發現 401 Unauthorized error 所以要在 frontend 加上 authentication
新增後端 sign_in sign_out detail API & @nuxtjs/auth
1
docker - compose run frontend yarn add @nuxtjs / auth
1
2
3
4
5
6
7
8
9
10
11
12
13
// autheg-frontend/nuxt.config.js
modules : [
'@nuxtjs/vuetify' ,
'@nuxtjs/axios' ,
'@nuxtjs/auth'
],
auth : {
endpoints : {
login : { url : '/users/sign_in' },
logout : { url : '/users/sign_out' , method : 'delete' },
user : { url : '/users/current' }
}
}
1
2
3
4
5
// autheg-frontend/store/index.js
export default {
state : () => ({
})
}
restart container 讓 frontend 吃到剛剛的設定
1
2
3
4
5
6
7
8
9
10
11
12
13
14
15
16
17
18
19
20
21
22
23
24
25
26
27
28
29
30
31
32
33
34
35
36
37
38
39
40
41
42
43
44
45
46
47
48
49
50
51
52
53
54
55
56
// autheg-frontend/pages/login.vue
< template >
< v - layout >
< v - flex >
< v - card v - if = "$auth.state.loggedIn" >
< v - alert type = "error" : value = "error" > < /v-alert>
< v - card - text >
Logged in as < /v-card-text>
< v - card - actions >
< v - btn @ click = "logout" > Log out < /v-btn>
< /v-card-actions>
< /v-card>
< v - card v - else >
< v - alert type = "error" : value = "error" > < /v-alert>
< v - card - text >
< v - form >
< v - text - field v - model = "email" label = "Email" />
< v - text - field v - model = "password" label = "Password" type = "password" />
< /v-form>
< v - card - actions >
< v - btn @ click = "login" > Log in < /v-btn>
< /v-card-actions>
< /v-card-text>
< /v-card>
< /v-flex>
< /v-layout>
< /template>
< script >
export default {
data () {
return {
email : '' ,
password : '' ,
error : null
}
},
methods : {
login : function () {
this . $auth . login ({
data : {
user : {
email : this . email ,
password : this . password
}
}
}). catch ( e => { this . error = e + '' })
},
logout : function () {
this . $auth . logout (). catch ( e => { this . error = e + '' })
}
}
}
< /script>
現在可以到 /login 試試看登入了
如果想要讓 user 沒有 login 的狀態下都 redirect 到 login page 就加上
1
2
3
4
5
6
7
8
9
10
11
12
13
14
15
16
17
18
19
20
21
22
23
24
25
26
27
28
29
30
31
// autheg-frontend/pages/index.vue
< template >
< v - layout >
< v - flex >
< v - list >
< v - list - tile v - for = "example in examples" : key = "example.id" : class = "example.colour" >
< v - list - tile - content > < /v-list-tile-content>
< /v-list-tile>
< /v-list>
< /v-flex>
< /v-layout>
< /template>
< script >
export default {
middleware : [ 'auth' ],
data () {
return {
examples : []
}
},
methods : {
async updateExamples () {
this . examples = await this . $axios . $get ( '/examples' )
}
},
mounted () {
this . updateExamples ()
}
}
< /script>
現在可以 try 一下
from How to separate frontend + backend with Rails API, Nuxt.js and Devise-JWT
from How to separate frontend + backend with Rails API, Nuxt.js and Devise-JWT
參考文件
 from How to separate frontend + backend with Rails API, Nuxt.js and Devise-JWT
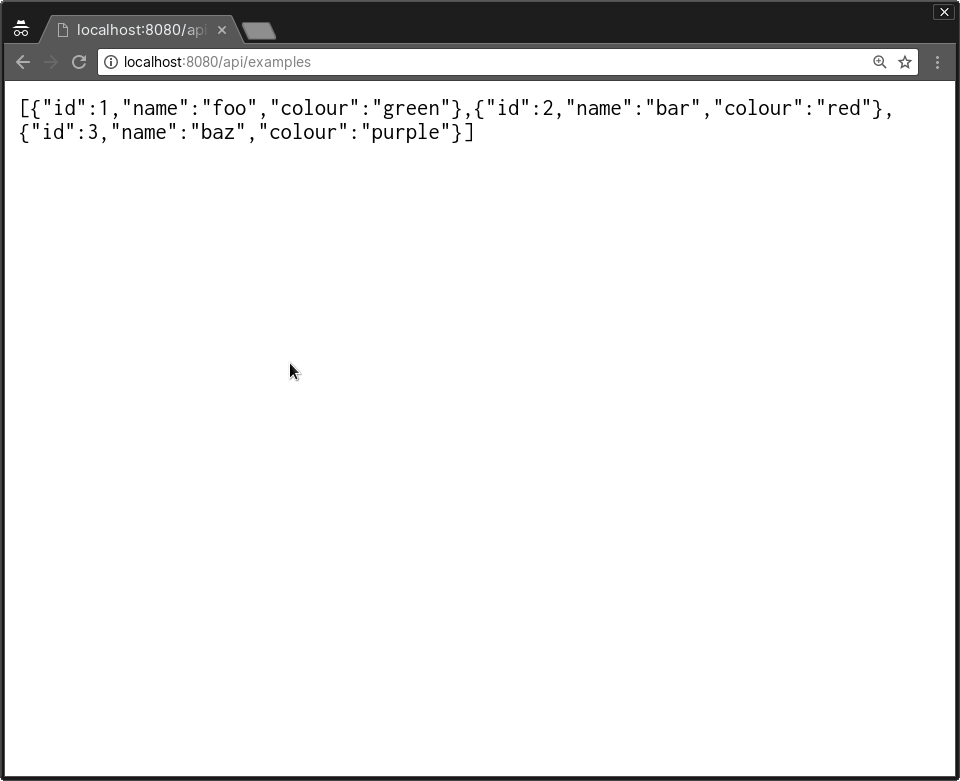 from How to separate frontend + backend with Rails API, Nuxt.js and Devise-JWT
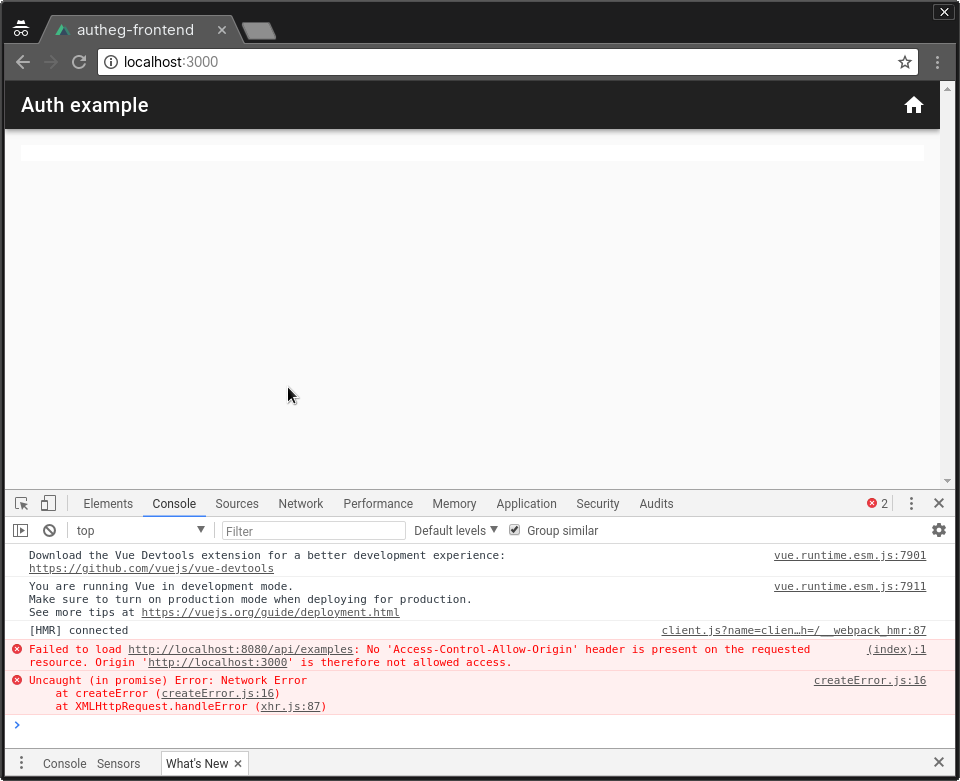 from How to separate frontend + backend with Rails API, Nuxt.js and Devise-JWT
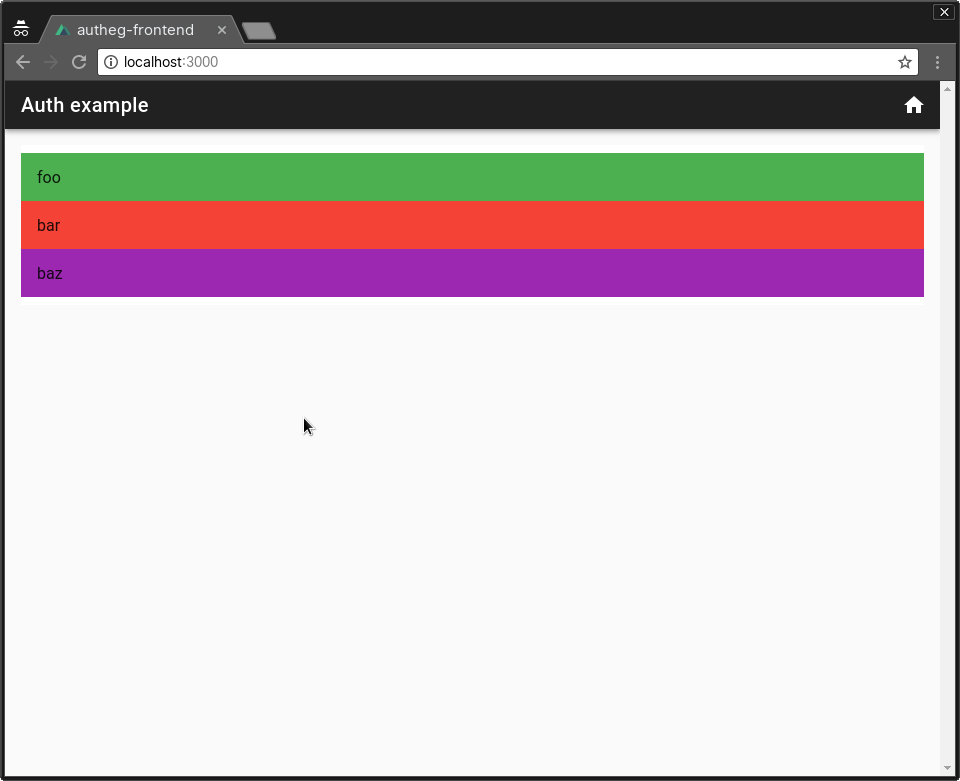 from How to separate frontend + backend with Rails API, Nuxt.js and Devise-JWT
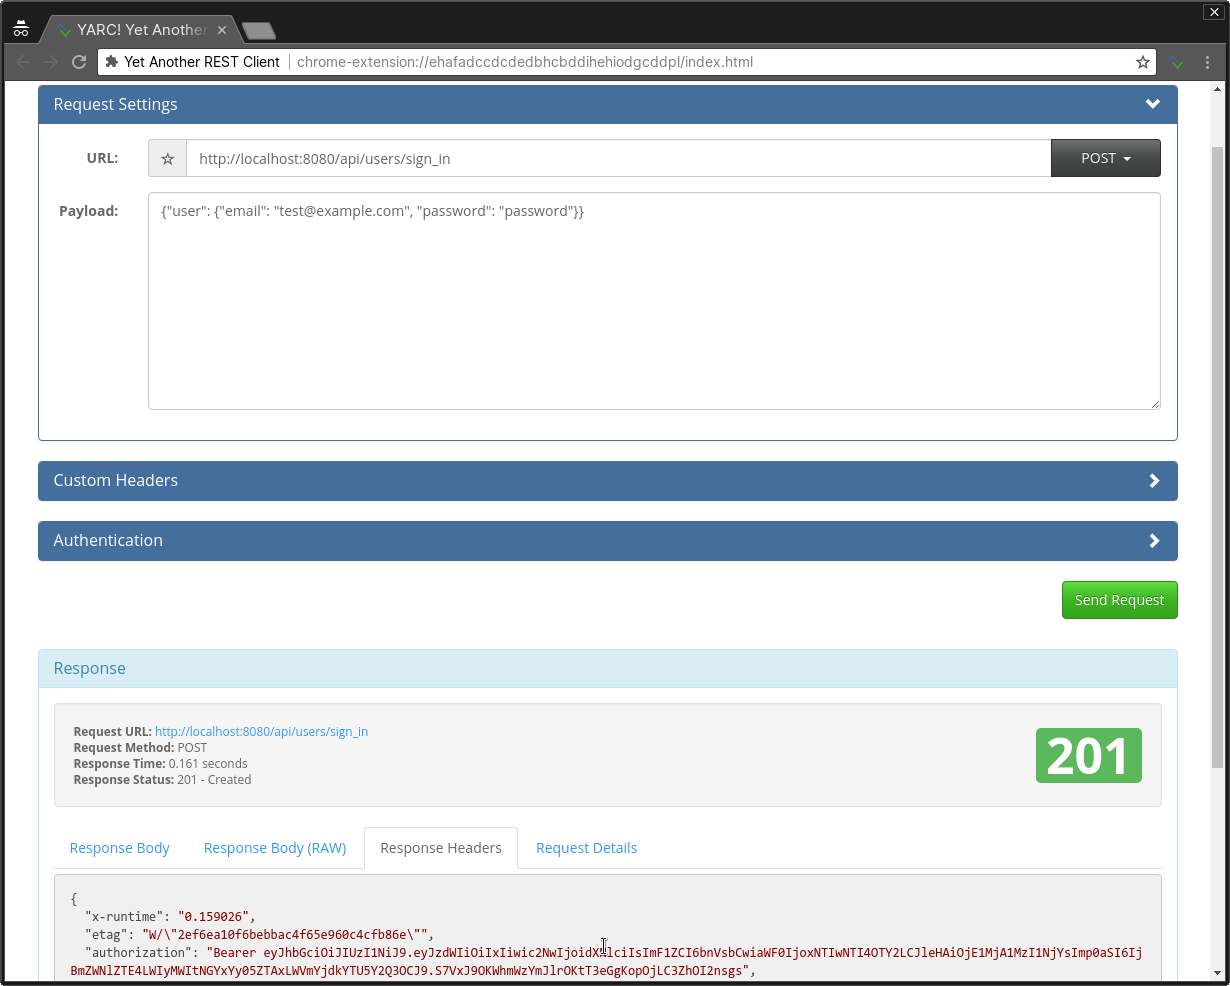 from How to separate frontend + backend with Rails API, Nuxt.js and Devise-JWT
 from How to separate frontend + backend with Rails API, Nuxt.js and Devise-JWT
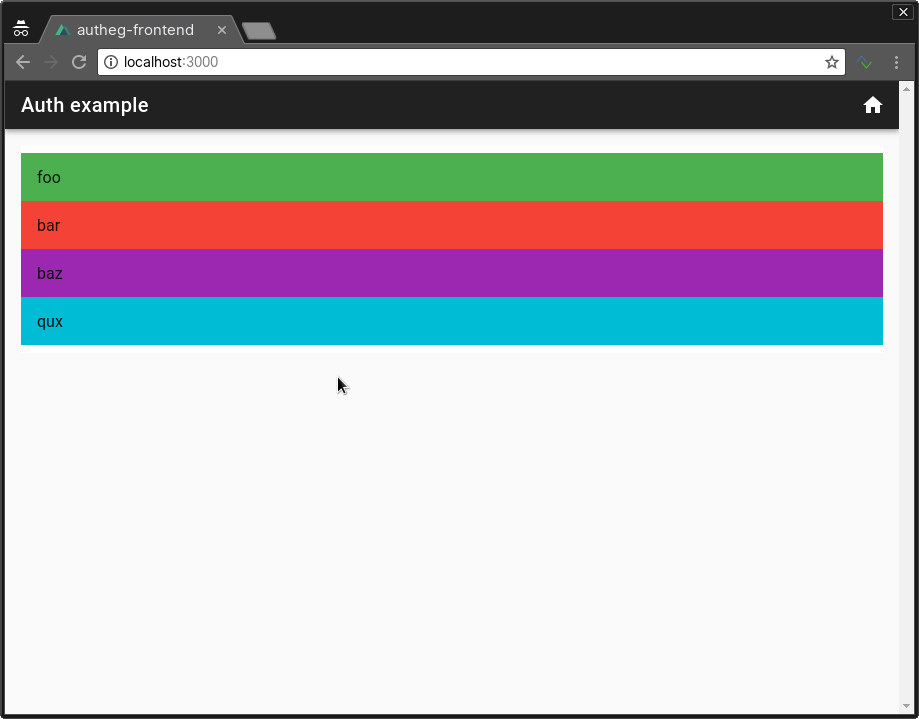 from How to separate frontend + backend with Rails API, Nuxt.js and Devise-JWT